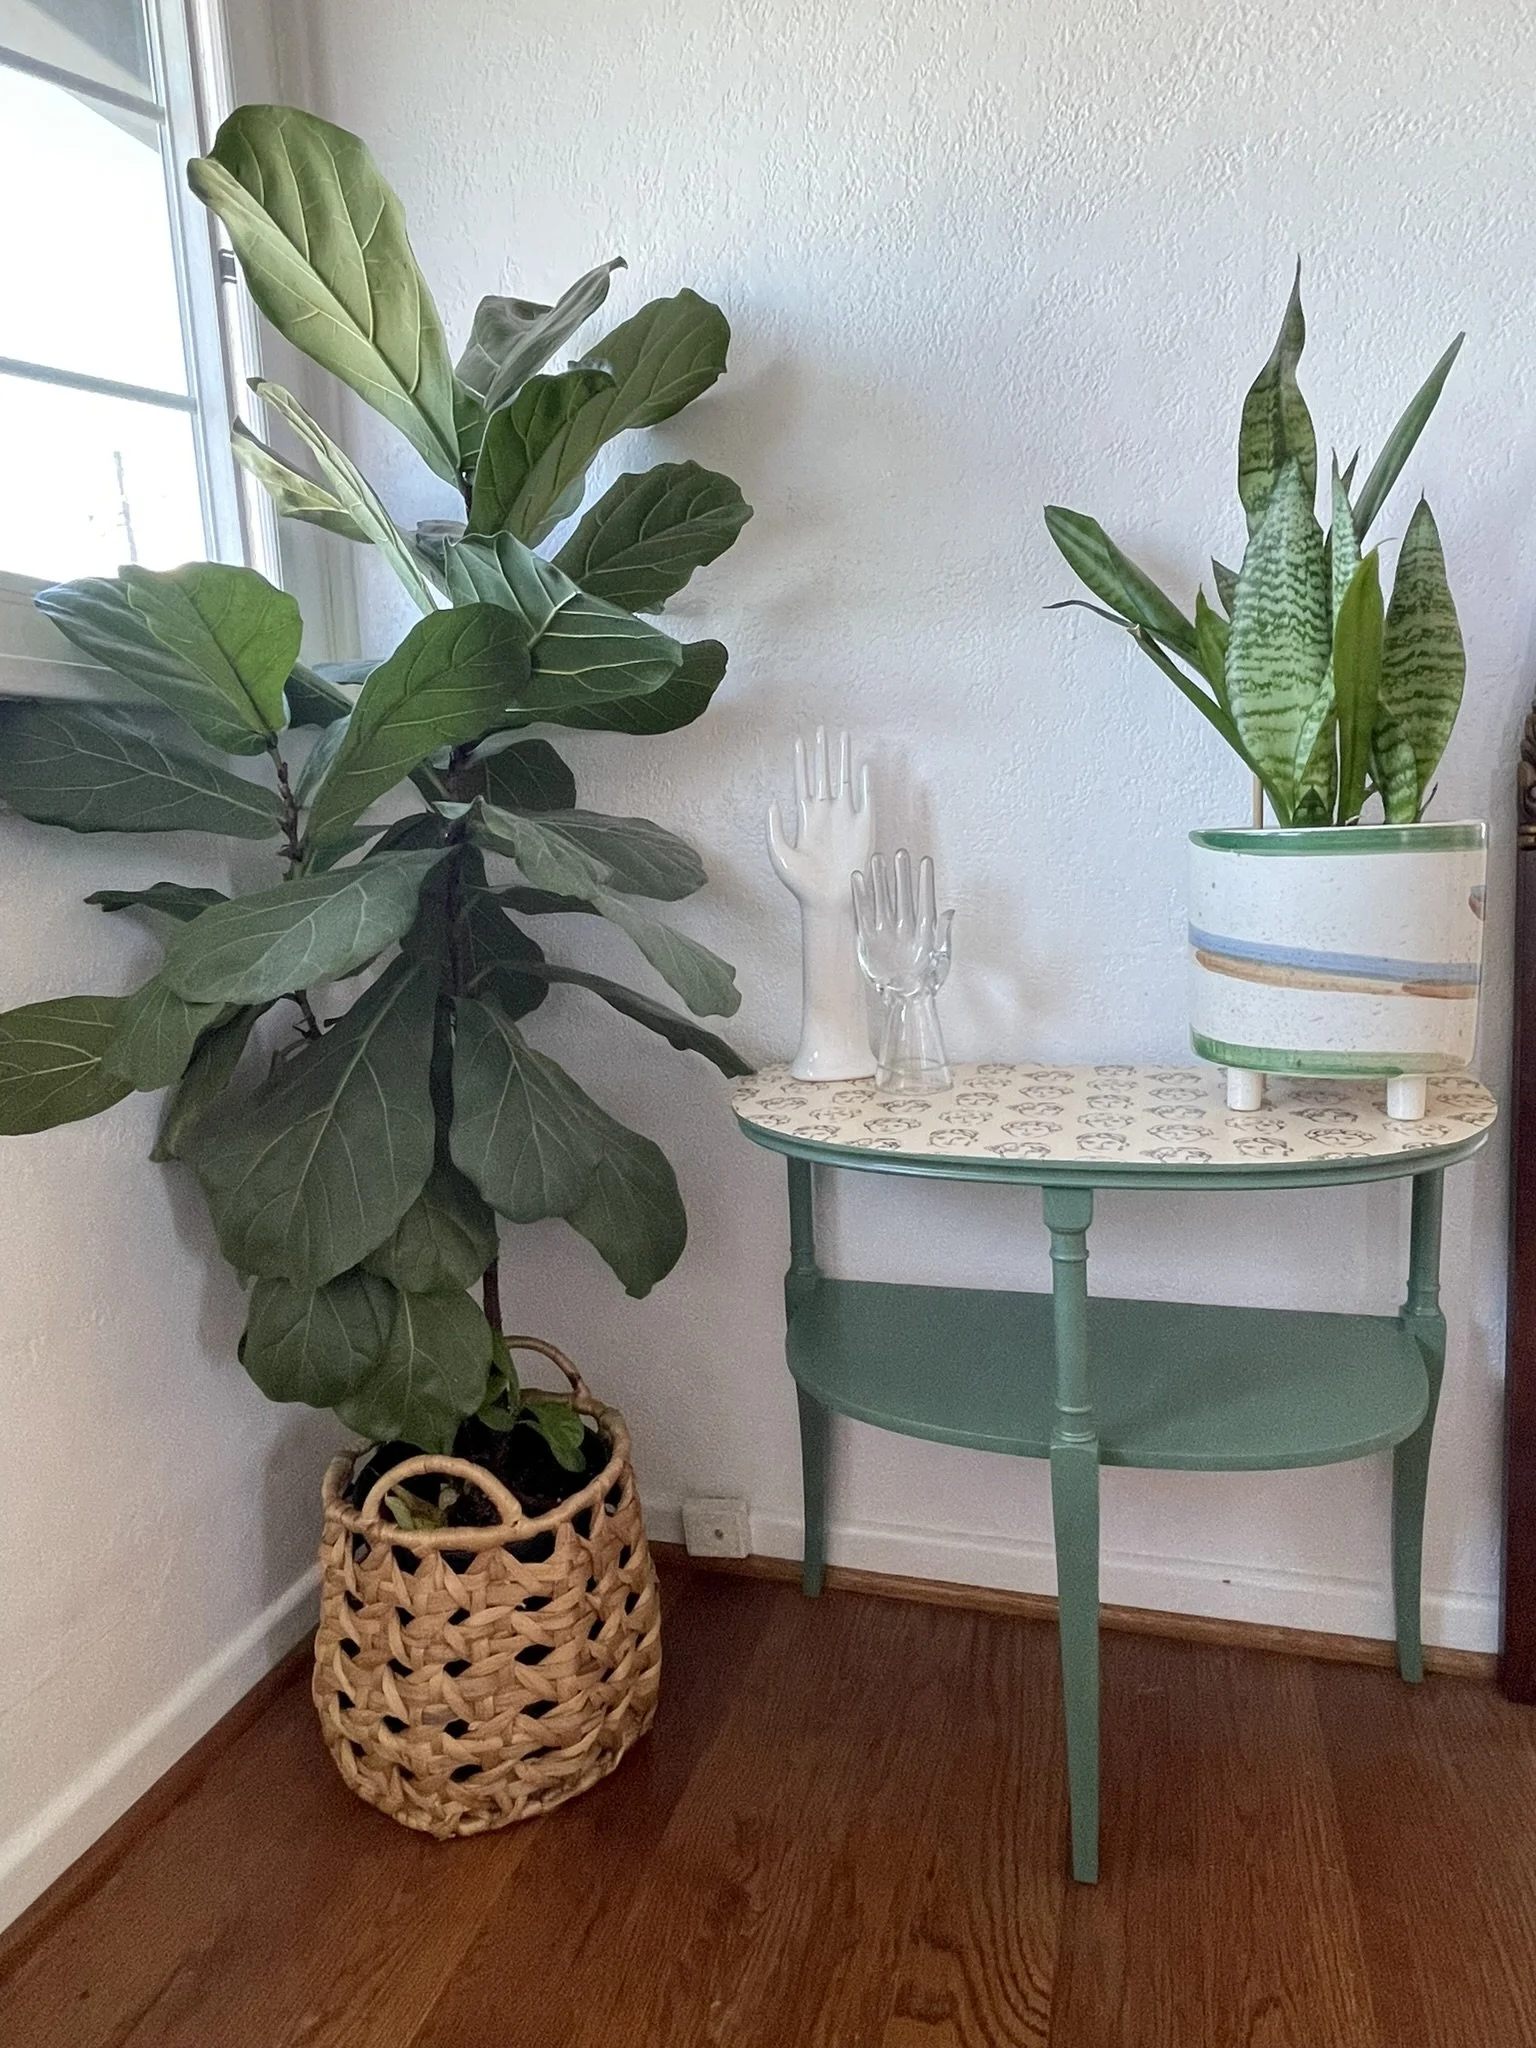
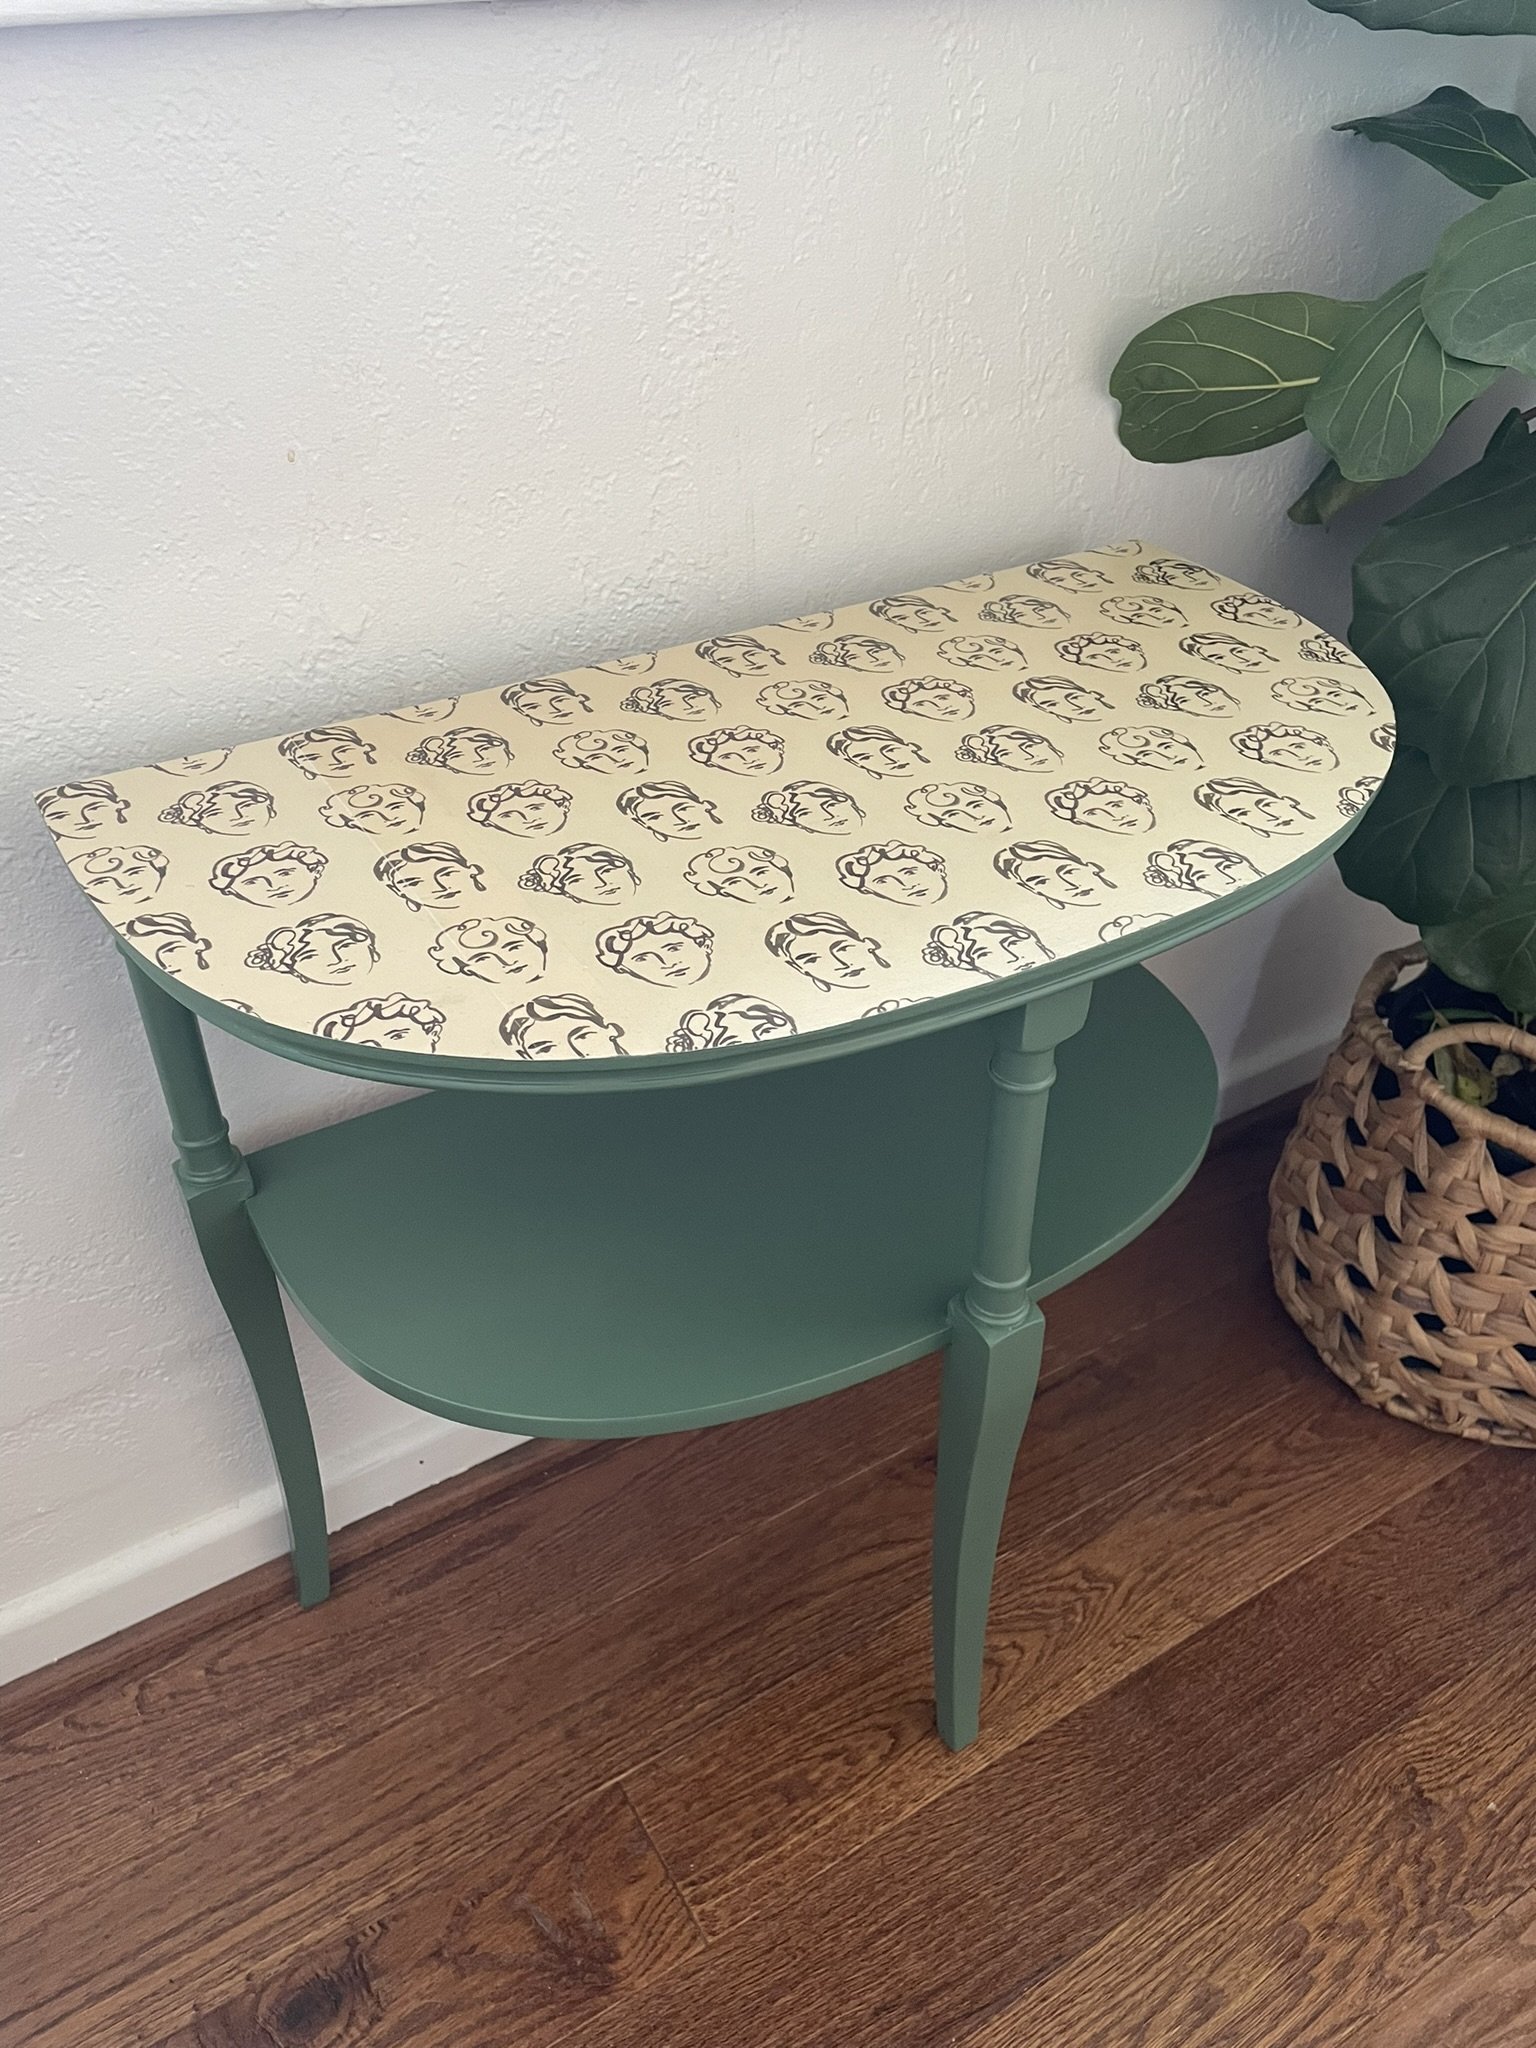
Update Your Furniture with Wrapping Paper
Have you ever looked at a piece of furniture in your home and thought it could use a little sprucing up? Maybe that side table has seen better days, or your bookshelf is just a bit too plain for your colorful personality. Well, I have a fun and easy solution for you: wrapping paper! It really is pretty simple with a few tips, and while I love peel and stick wallpaper, wrapping paper can be way more affordable, especially for small projects. So whether you're a pattern and color lover to your core, or you just want to dabble and play and experiment with some little pops of color around your home, I’m here to help and hopefully provide some inspiration to go find your favorite patterns and update some furniture at your house!
Supplies
Razor blade
Wrapping paper
Plant stand, side table, or similar
Mod Podge - your choice of sheen (I used Matte)
Spray adhesive
Scissors
Ruler
Paint of your choice—I like spray paint for personal pieces; or a paint sprayer. But colors are limited with spray paint so painting by hand is fine too, just takes longer
Sealer, depending on your paint
Step 1: Paint furniture
Clean, sand, repair, prime, and paint your furniture. See this video for a full tutorial on refinishing a vintage tallboy dresser.
Step 2: Clean surface you will be applying paper to
Start by cleaning the surface of the furniture. Make sure it's free from dust and grime to ensure the paper sticks well.
Step 2: Measure and cut paper
Measure the area you want to cover and cut the wrapping paper to size. Remember, it's better to cut a little too big than too small—you can always trim the excess later.
Step 3: Adhere paper to furniture
Next, apply a thin layer of Mod Podge to the furniture surface using a paintbrush or foam brush. Carefully place the wrapping paper onto the glued area. Smooth out any bubbles or wrinkles with your hand. It's a bit like wallpapering, but on a smaller scale.
Step 4: Seal paper
Once the paper is positioned perfectly, trim the excess with an Exacto knife. Then apply another 2-3 layers of Mod Podge on top. This not only seals the paper but also gives it a nice, protective finish. Let it dry completely before using the furniture. If you're feeling extra fancy, you can even add a coat of clear varnish for added durability.
Step 5: Enjoy your new table!
And there you have it—a quick and easy way to breathe new life into your furniture with just a single sheet of wrapping paper! Whether you're doing it for a seasonal refresh or just to add a splash of color, this project is sure to bring a smile to your face every time you see it. Grab that wrapping paper and let your creativity shine!
Loving the finished look of this cutie table!
Now that you've got the basics down, why not take it a step further? You could experiment with layering different patterns or colors to create a more complex design. Or, perhaps try using metallic wrapping paper for a touch of glamour. The possibilities are endless, and the best part is, you can always change it up whenever you feel like it.
Want more furniture makeovers? Check out YouTube and Instagram for lots of inspiration and bold colors!
Next Up
A super quick and affordable way to update a door—any door—in your house! Renter friendly! Stay tuned.


